Quick start
RunWisp is one small Go binary. You list the shell commands you want
to run in a runwisp.toml, and RunWisp takes care of the rest —
firing jobs on cron, restarting services when they crash, and
capturing every line of stdout and stderr so you can go back and
look at what happened. There’s a TUI
in your terminal and a Web UI
in your browser for poking around. No external database, no agent,
no sidecar.
It runs on Linux, macOS, and WSL — on x86_64 or arm64. There’s
no native Windows build; if Windows is where you live, run RunWisp
inside WSL.
1. Install
Section titled “1. Install”Pick whichever channel feels most natural for how you install
software. The binary is statically linked with zero runtime
dependencies, so as soon as it lands on your PATH, you’re done.
Figures out your OS and arch, grabs the right release, checks
the SHA-256, and puts runwisp on your PATH.
curl -fsSL https://get.runwisp.com | shGot Bun or Node already? The npm package is a tiny shim that downloads the matching native binary the first time you run it.
Want to try it without a global install?
bunx runwispnpx runwispThat’s the tidiest option for CI runners and other throwaway environments. For something that sticks around:
bun add -g runwispnpm install -g runwispPick the right runwisp-{linux,darwin}-{x64,arm64}.tar.gz
off the GitHub releases page. There’s a
checksums-sha256.txt sitting next to it if you want to
verify before extracting.
tar -xzf runwisp-linux-x64.tar.gzsudo mv runwisp /usr/local/bin/runwispYou’ll need Go 1.25+ and Bun.
git clone https://github.com/runwisp/runwispcd runwispbun installbun run buildYour binary will be at apps/runwisp/runwisp.
2. First run
Section titled “2. First run”Pick a directory where you’d like your tasks to live — a project root, your home folder, anywhere you’d happily keep a config file — and run:
runwispThe first time, when there’s no runwisp.toml next to you yet,
RunWisp won’t go behind your back. It asks:
No runwisp.toml at /home/user/myproject.Create a starter with one example task? [Y/n]Hit Enter. RunWisp writes a starter file, fires up its
daemon in the background, and drops you into the TUI. (The
screenshot below shows a demo instance with some history; yours
will start with just the hello task.)
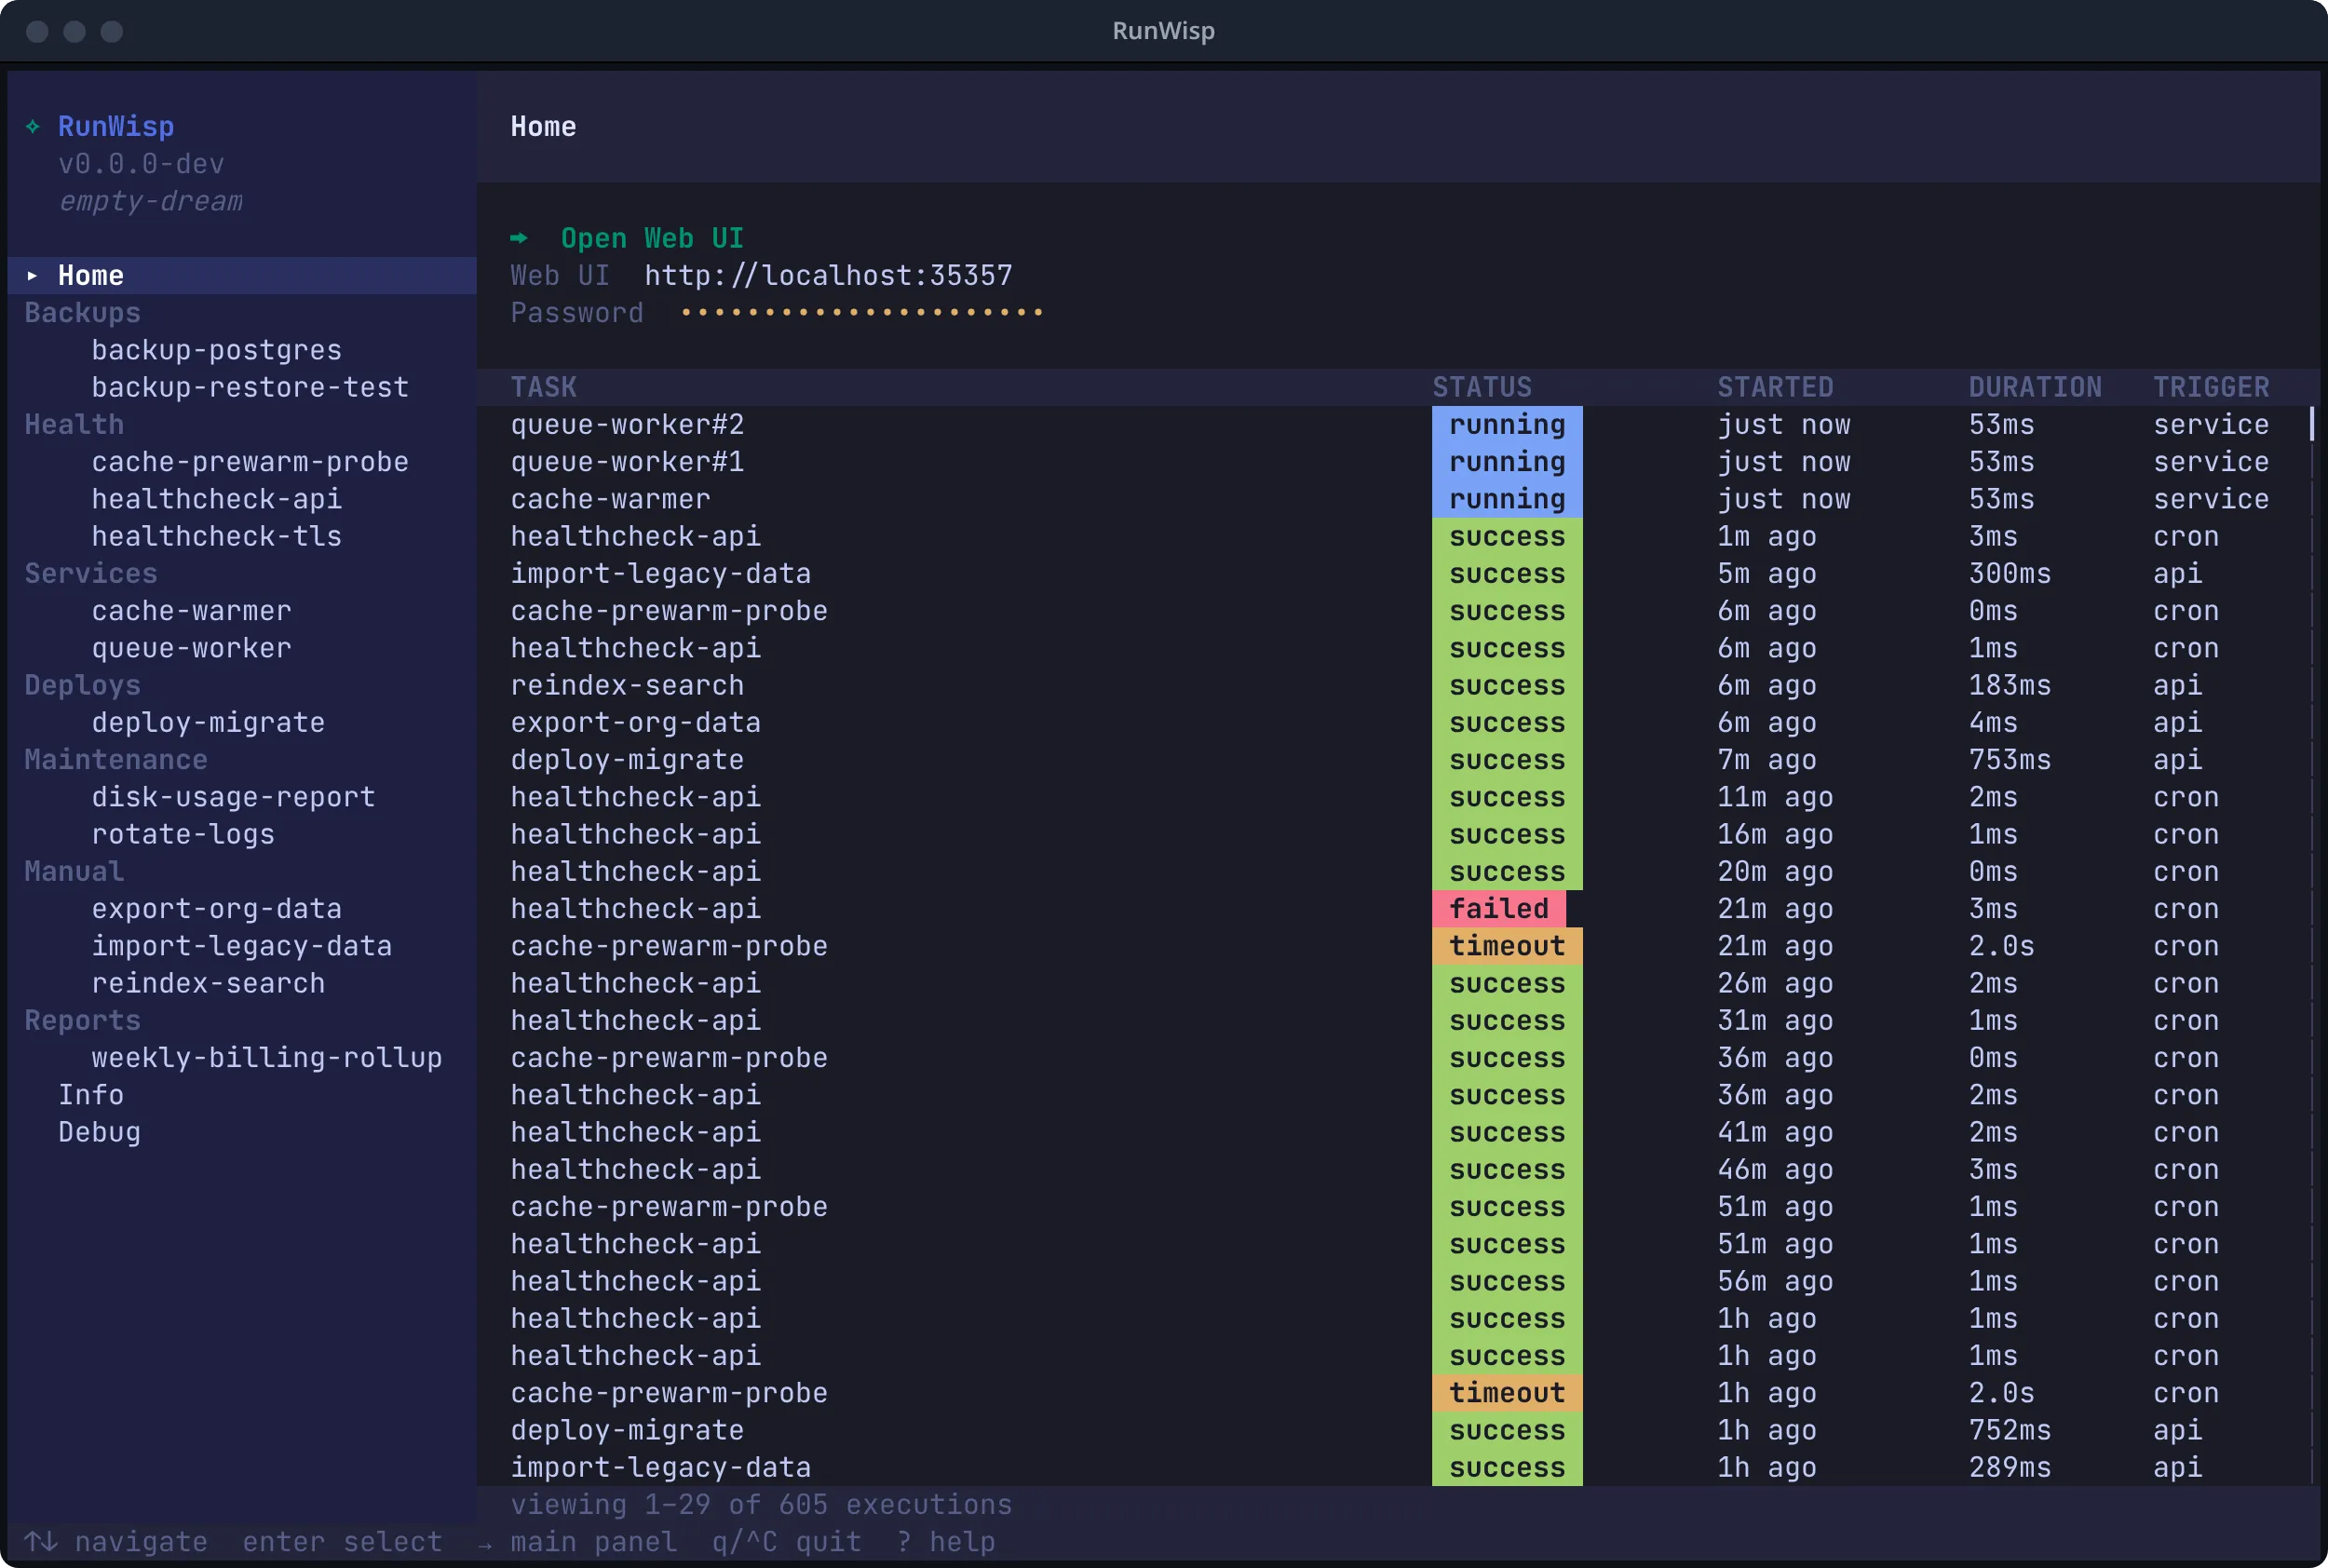
The Home page hands you two things worth remembering: the Web UI
URL (http://localhost:9477 out of the box) and an
auto-generated password for
logging in from the browser. You
won’t need the password to open the dashboard from this TUI — it
shoves a logged-in session straight at your browser. But if you’ll
ever want to hit the dashboard from another machine, or from a
fresh browser, highlight the password row now and press
Enter to copy it to the clipboard.
Here’s the runwisp.toml that just got written: one task you can
actually run, plus a couple of commented hints showing the most
common next steps.
# Docs: https://docs.runwisp.com/configuration/overview/
[tasks.hello]description = "Example task. Trigger it from the TUI (press r) or the Web UI."run = "echo hello from runwisp"
# Schedule a task with cron:# [tasks.heartbeat]# cron = "* * * * *"# run  = "date"
# Long-running service (auto-restart, supports replicas):# [services.worker]# instances = 1# run = "node ./worker.js"3. Run the example task
Section titled “3. Run the example task”There are three places you can fire off hello. They all hit the
same daemon and land in the same history — pick whichever is closest
to where your hands already are.
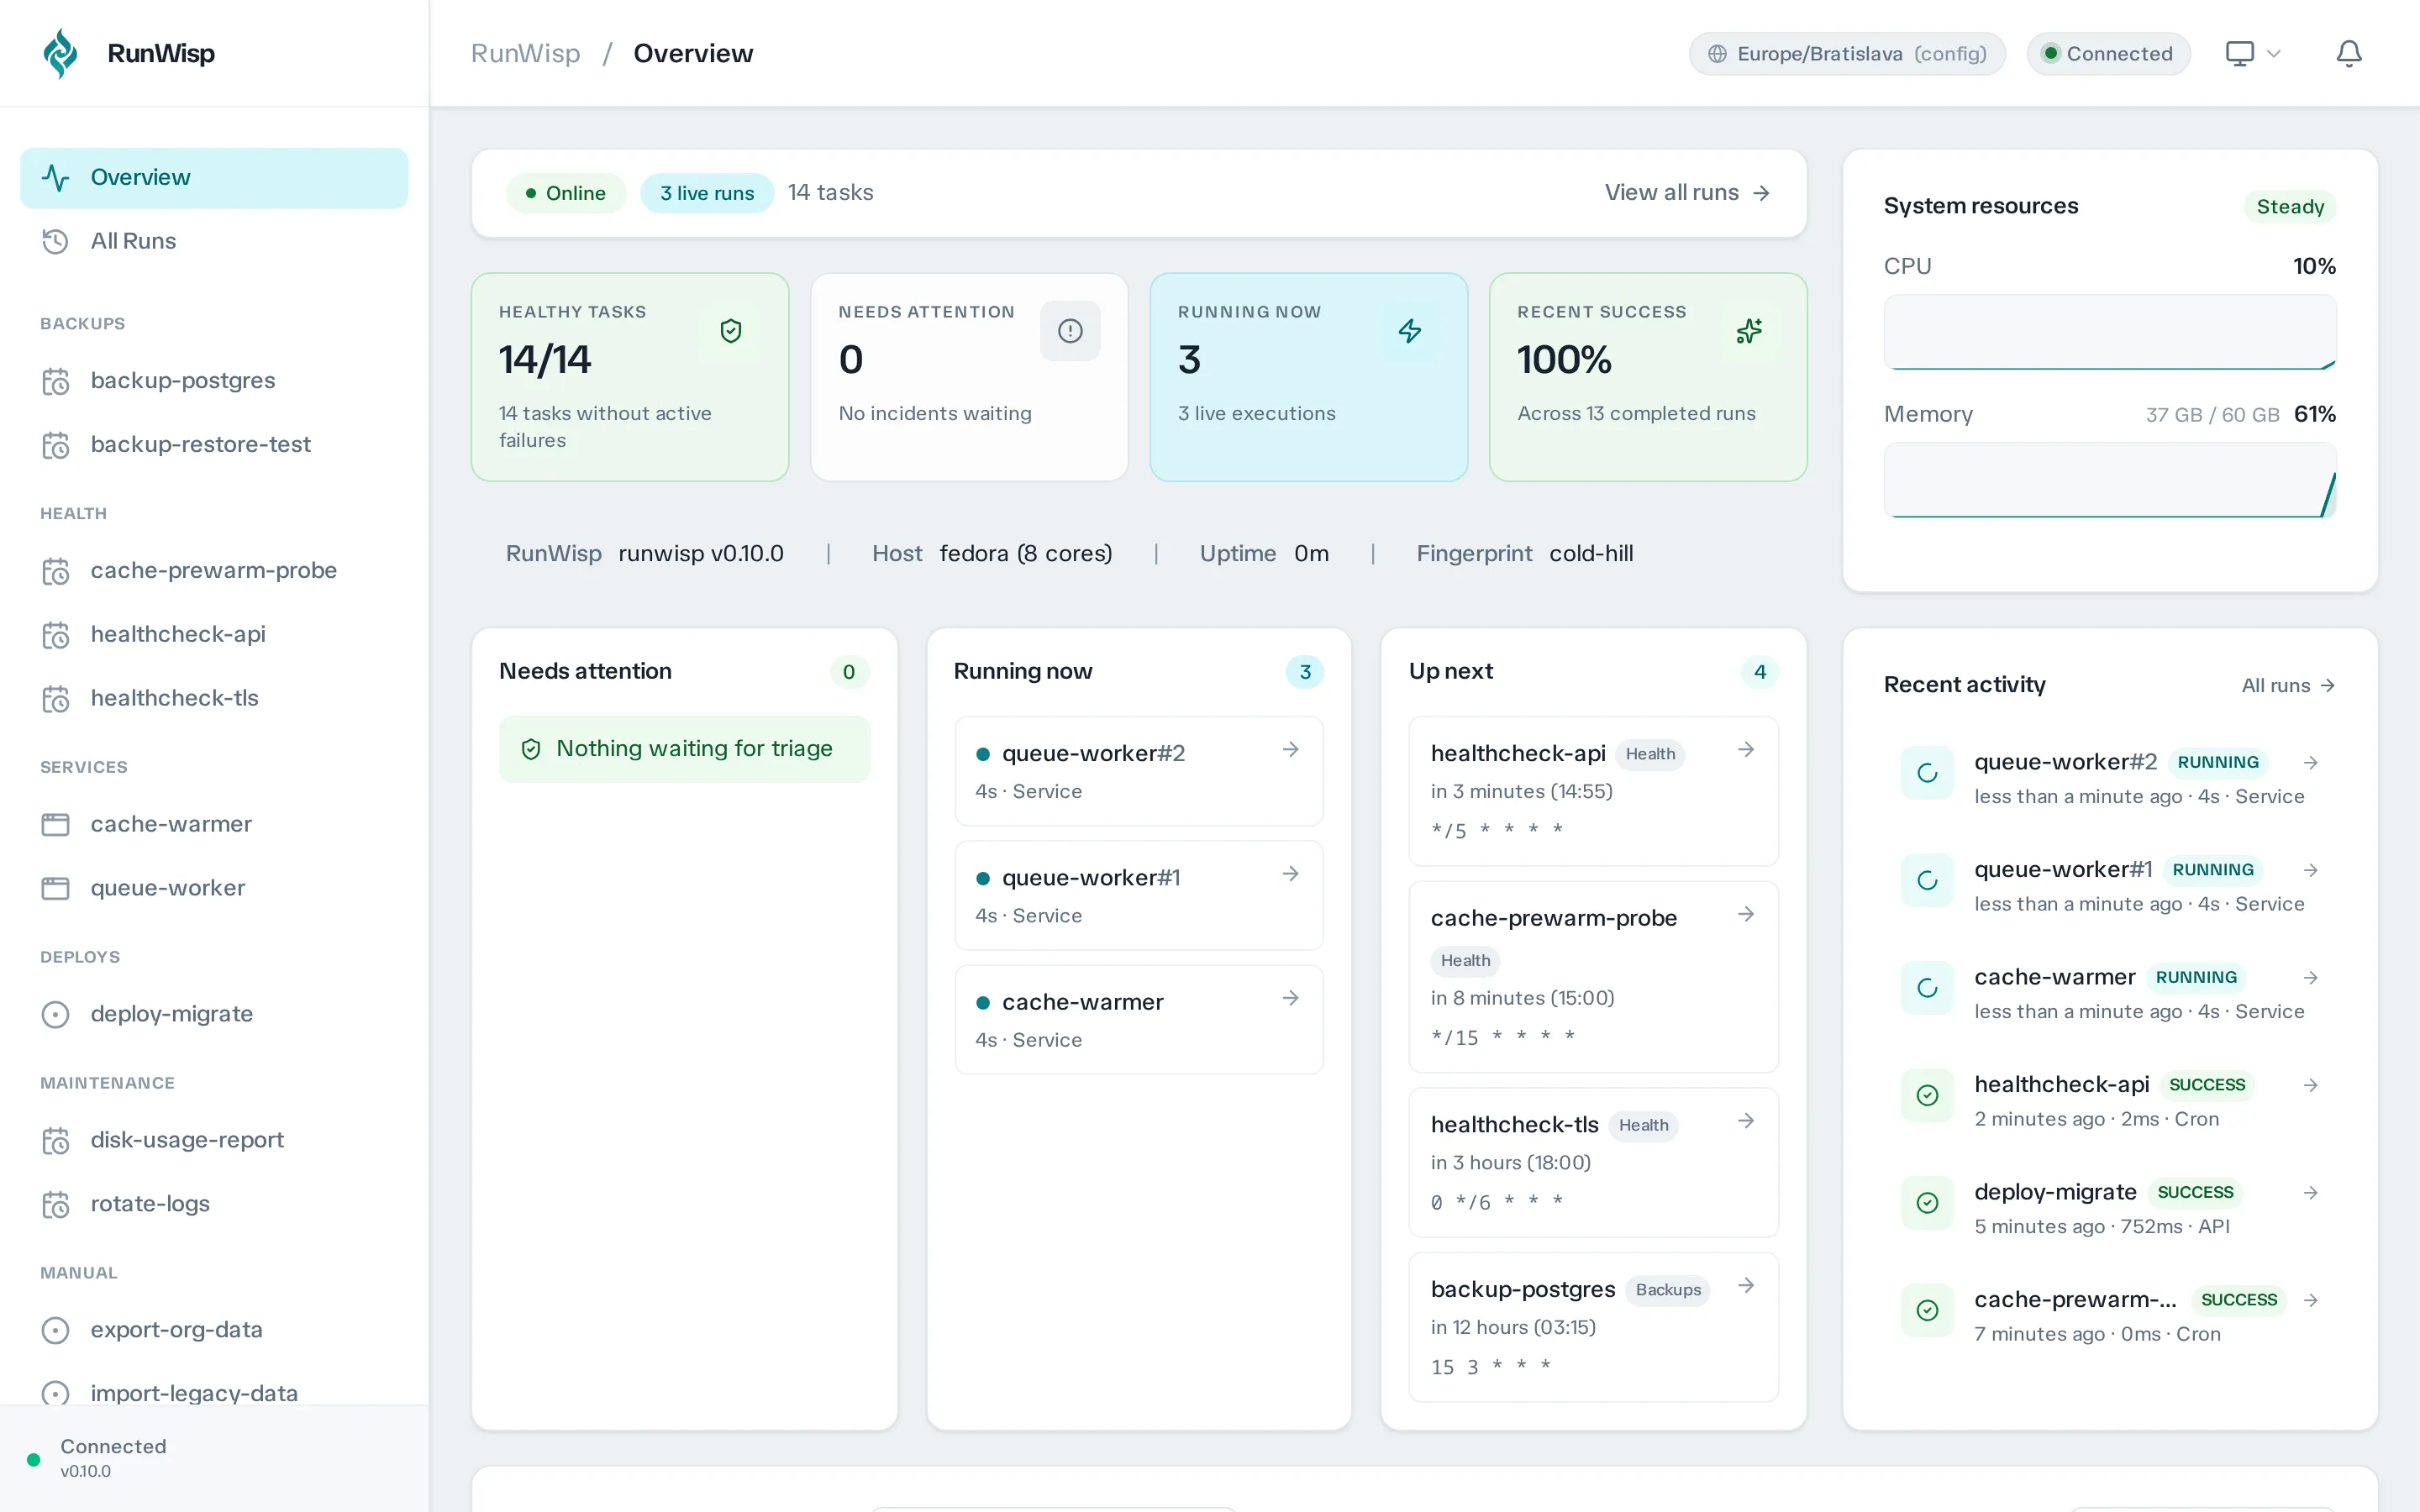
Open the dashboard (step 4 walks through that the first time
around), click hello in the sidebar, and hit Run Task.
hello from runwisp streams into the log pane live, and the
run shows up in the task’s history.
The sidebar on the left lists every task and service in your
config. Press ← (or just click) to focus the
sidebar, arrow down to hello, and hit r. The
run detail view opens and the output streams in live.
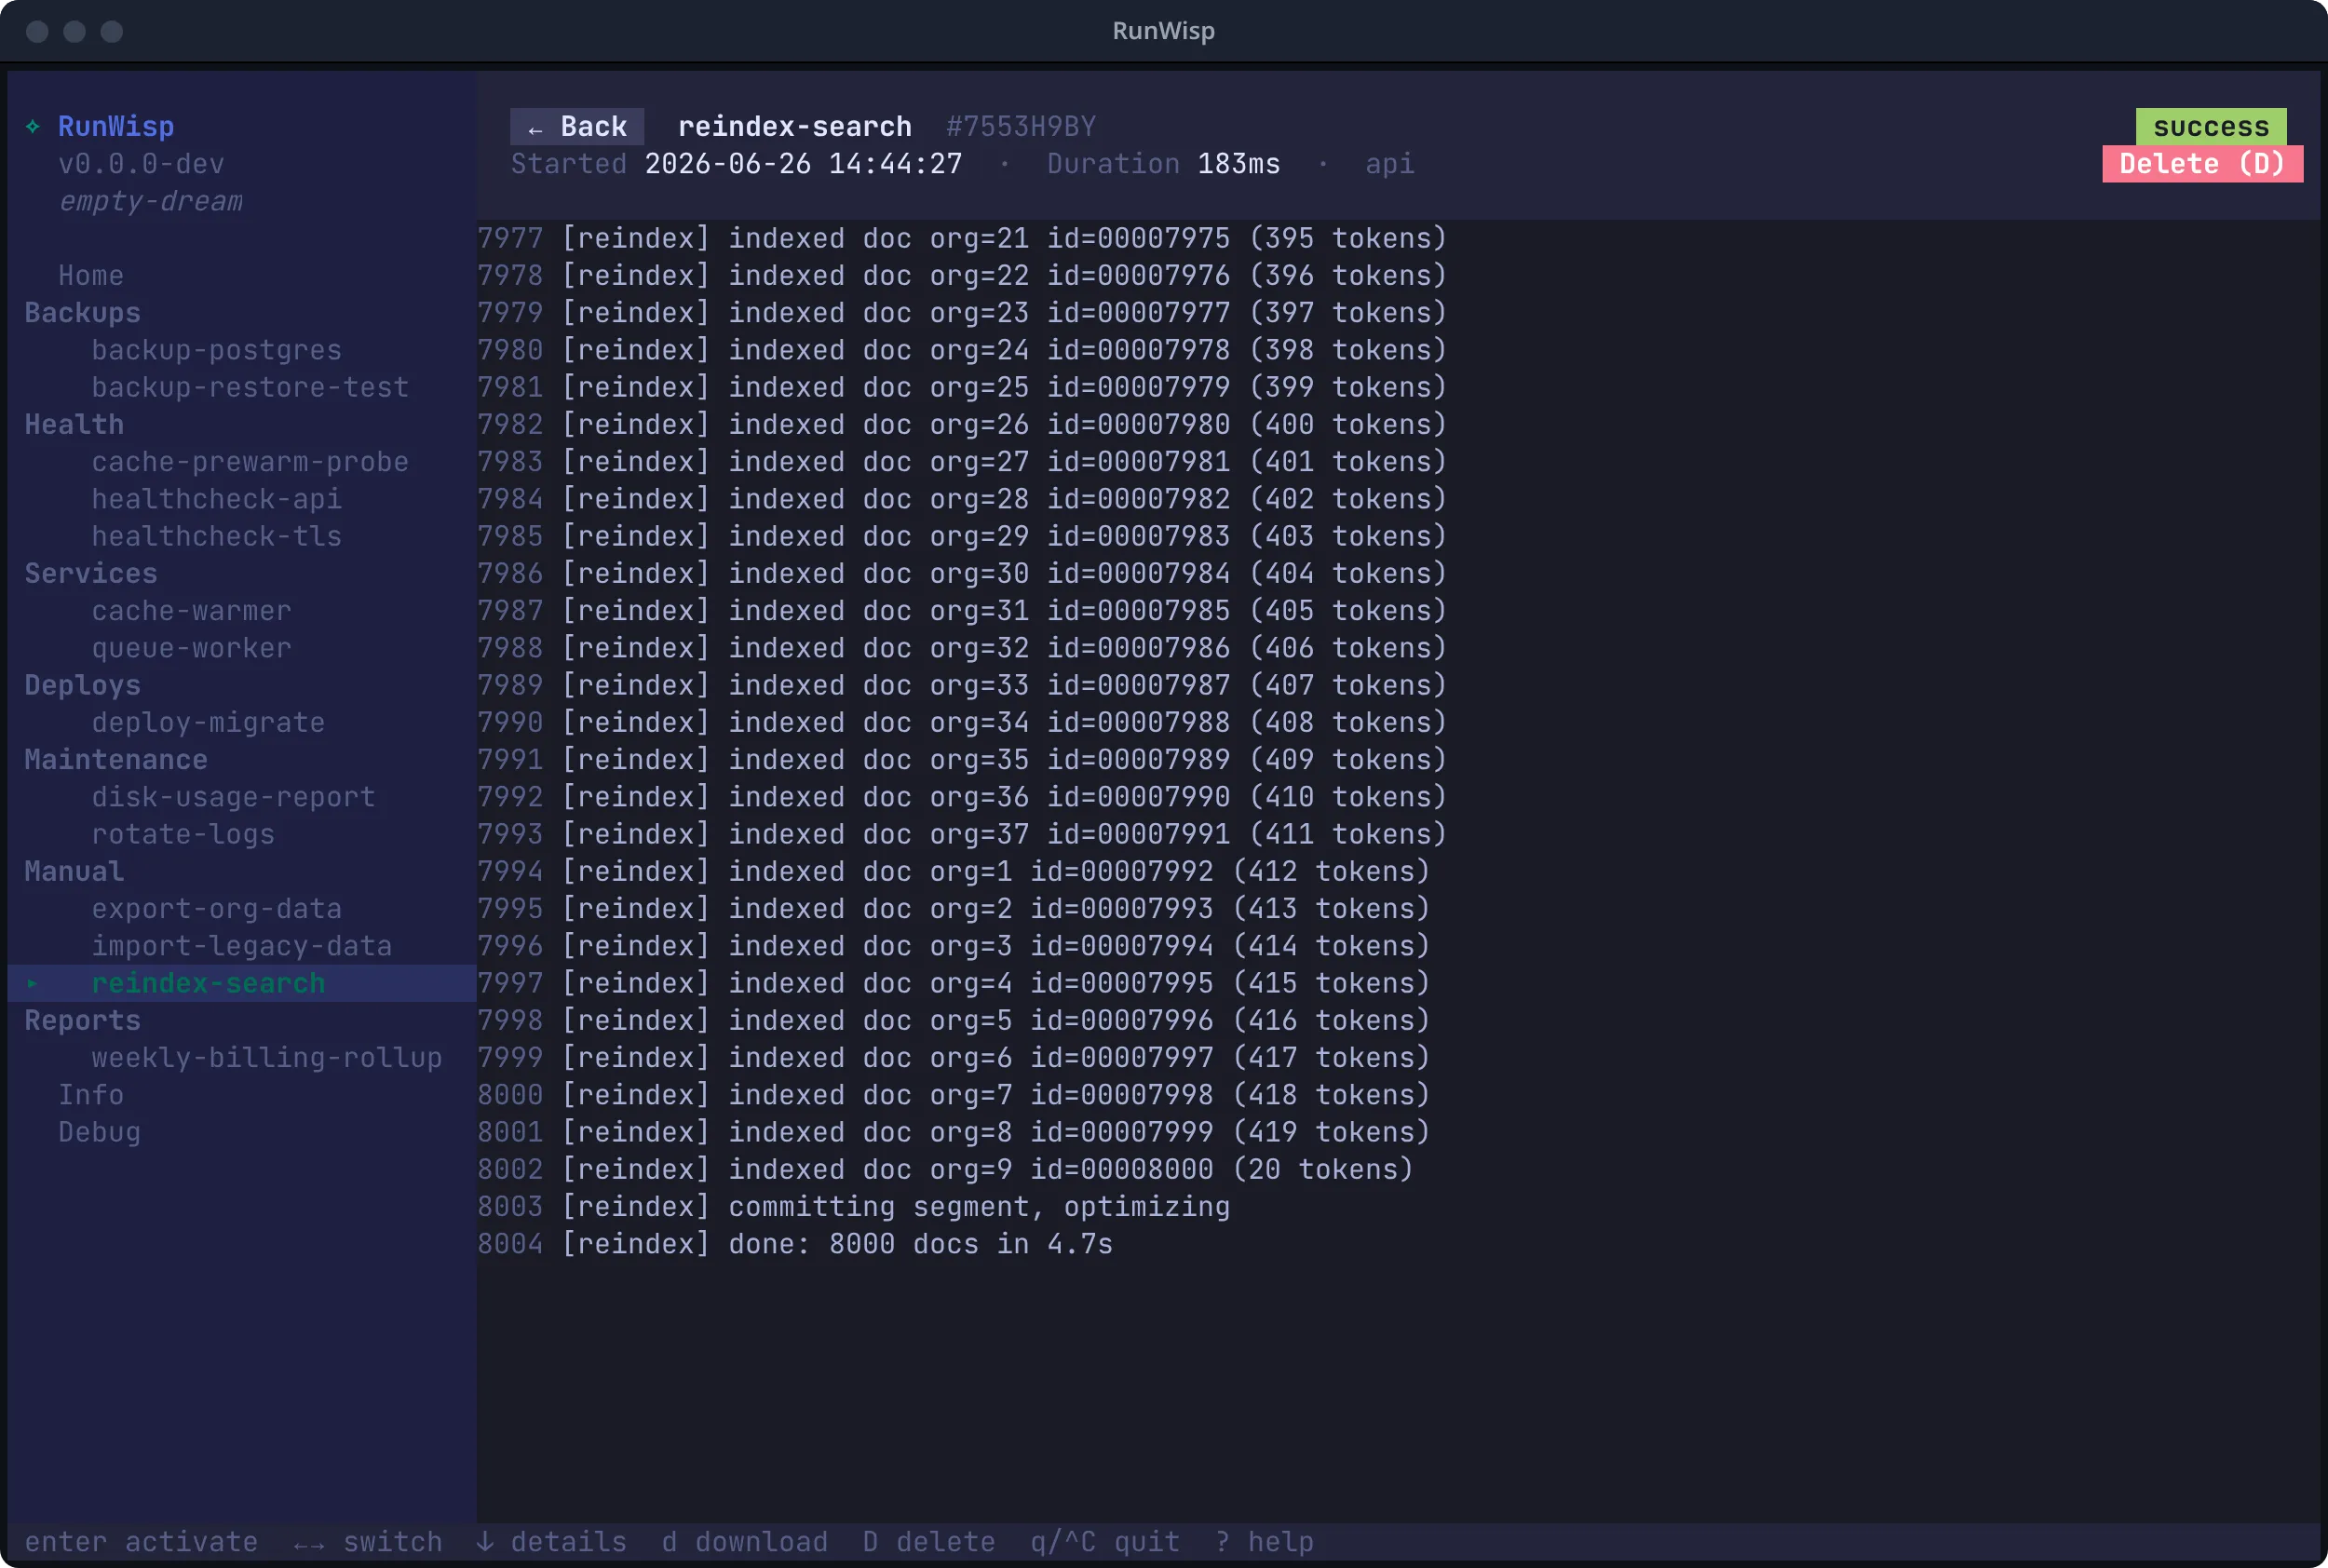
From here, r kicks off another run, s stops one that’s still going, d downloads the whole log, f blows the pane up to fullscreen, and Esc closes the view and hands focus back to the sidebar. Older runs sit in the list above the active one — scroll up to replay any of them.
From a shell:
runwisp exec hellorunwisp exec pipes stdout and stderr straight to your
terminal and exits with the run’s own exit code, so it slots
cleanly into a script or a one-off command. If a daemon’s
running, it goes through the REST API. If not, it just runs
the task in-process from runwisp.toml. Force one mode or
the other with --daemon / --standalone.
4. Open the Web UI
Section titled “4. Open the Web UI”Press Esc to leave the exec view, arrow back up to
Home in the sidebar, then highlight ⮕ Open Web UI on the
Home page and hit Enter. Your default browser opens the
dashboard, already logged in. Behind the scenes, the TUI mints a
single-use
launch ticket, so
your password never travels through the URL. On a host without a
browser, the TUI just prints the URL — open it from another
machine and sign in with the password you copied in step 2.

A few knobs worth knowing while you’re here:
- Set
RUNWISP_PASSWORDto pick your own password instead of the generated one. The daemon reads it in memory only, never writes it to disk, so it plays nicely with Docker secrets and systemd’sLoadCredential. - Running purely locally — a dev container, your laptop, an isolated
network — and the login wall is just in the way? Set
RUNWISP_NO_AUTH=1to skip it entirely. - Use
--hostand--portto move the dashboard somewhere else. Defaults are127.0.0.1and9477— loopback only — which is almost always what you want.
5. Make it yours
Section titled “5. Make it yours”That’s the whole loop. Now swap [tasks.hello] out for whatever
you actually came here to run. A few patterns to crib from:
[tasks.backup-db]cron       = "0 2 * * *"      # nightly at 2 AMon_overlap = "skip"           # don't pile up if a run is still goingkeep_runs  = 30               # keep the last 30 runs on diskrun        = "pg_dump mydb | gzip > /backups/mydb-$(date +%F).sql.gz"
[tasks.health-check]cron = "*/5 * * * *"          # every five minutesrun  = "curl -sf https://myapp.example.com/health || exit 1"
[services.worker]instances = 3                 # keep three copies alive at all timesrun       = "node /app/worker.js"
[tasks.*] run on a
cron schedule or on demand and then exit.
[services.*] are meant to stay up —
when one falls over, RunWisp restarts it, and it keeps
instances = N copies running
in parallel. And that on_overlap = "skip" up there is one of three
concurrency policies for when a run is
still going as the next one comes due.
RunWisp doesn’t watch runwisp.toml for changes — you tell it when to
pick them up. For the everyday edits — adding, changing, or removing
tasks and services, or tweaking [defaults] — run
runwisp reload (or send SIGHUP). It re-reads
the file and reconciles the running task set in place. Reload is
validate-first, so a typo is rejected and the daemon keeps running, and
in-flight runs finish under the definition they started with.
Reach for runwisp restart when you’ve changed a restart-only setting
([daemon], the scheduler timezone, [storage], [notify], or the
bind host/port), or when you want a fresh boot to re-fire run_on_start
and missed-run catch-up. It stops the daemon and starts a new one with
your edits loaded. (If you installed RunWisp as a service, it asks
systemd or launchd to do the restart so the service manager stays in the
loop.) Until you reload or restart, the TUI header, runwisp status,
and the Web UI all show a notice that the config on disk no longer
matches what the daemon is running. runwisp stop shuts the daemon down
without starting a new one.